


Getting into physical modular synthesis was inevitable.
If I look back at my digital footprint, the warning signs have been flashing for decades. I used to love early versions of Reason. The virtual representation of a physical studio rack allowed me to flip the rack around, grab virtual patch cables, and route a matrix sequencer directly into a filter cutoff. From there, I spent extensive time deep inside Arturia’s Moog Modular VST. For the last couple of years, VCV Rack has been my primary playground. I love the flexibility to completely tear down a setup and rebuild it from scratch based on whatever sound I am chasing that day.
But clicking a mouse on a screen eventually loses its tactile appeal. You start wanting physical resistance. You want to feel the click of a patch cable seating into a jack.
The problem with moving from VCV Rack to a physical Eurorack system is that the software does not have a physical power supply. In software, you drag a module into the rack, and it just works. In the real world, you have to feed these modules raw electricity. If you do it wrong, you don’t just get an error message. You let out the magic smoke, and you permanently destroy a very expensive piece of hardware.
Before you plug a single audio cable in, you have to understand the power.
The Three Numbers: +12V, -12V, and 5V
When you look at the spec sheet for any Eurorack module, you will see its power draw listed across three specific voltage rails: +12V, -12V, and +5V.
This can be confusing if you are used to guitar pedals that just take a single 9V centre-negative plug. Modular synthesisers require a dual-rail power supply. Here is exactly what those numbers mean and why they exist.
The Dual Rails (+12V and -12V)
Audio signals are alternating current (AC). When a sound wave travels down a cable, it swings positively and negatively around a zero-point (ground).
To process that signal cleanly, the internal components of a synthesiser module, specifically the operational amplifiers (op-amps), need physical electrical headroom on both sides of that zero-point. The +12V rail supplies power to the top half of the sound wave. The -12V rail powers the bottom half.
If you only powered a module with positive voltage, the bottom half of the audio waveform would literally hit an electrical brick wall and clip off. By providing both +12V and -12V, the module offers a wide 24-volt window, allowing the audio signal to swing freely without distortion. This is the core engine of your synthesiser.
The Digital Brains (+5V)
The 5-volt rail is a legacy from early digital components. While the 12V rails handle the analog audio path, microprocessors, LED screens, and digital logic gates operate on 5 volts.
Many older digital modules require you to supply this 5V directly from your case’s power supply. However, many modern digital modules simply draw power from the +12V rail and step it down to 5V internally using their built-in regulators. You still need to check the spec sheet. If a module requires 5V and your power supply does not provide a 5V rail, the module simply will not turn on.
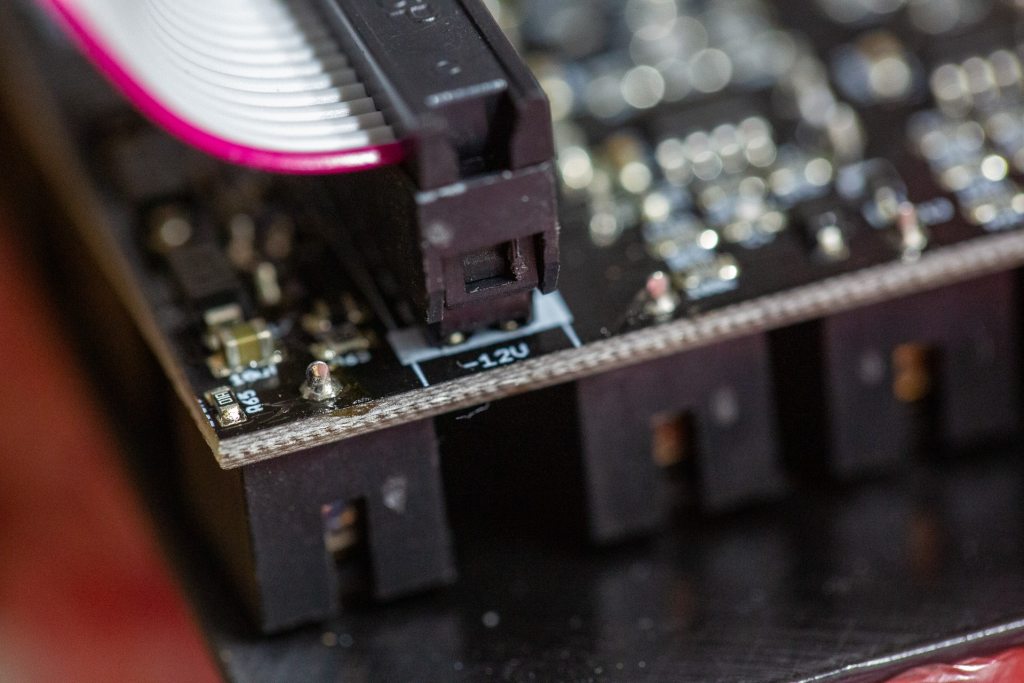
The Red Stripe Down Rule
Connecting these modules to the power board (the bus board) is where most beginners make their first, and most expensive, mistake.
Modules are connected via a ribbon cable. One side plugs into the module, and the other side plugs into the bus board. The standard Eurorack power cable has a red stripe running down one side of the grey ribbon.
That red stripe indicates the -12V line.
You must align the red stripe with the -12V pin on both the module and the bus board. Most modern modules have a white line or the text “-12V” printed on the circuit board to guide you. Many also use shrouded headers (plastic boxes around the pins) with a notch cut out, so you can plug the cable in only one way.
Do not trust the shroud blindly. Always visually trace the red stripe to the -12V marking. If you plug a module in backwards, you send positive voltage down the negative rail. Some modern modules have reverse-polarity protection built in to save you from your own stupidity. Many do not. If you get it wrong, you will instantly fry the integrated circuits.
ModularGrid and The 80% Rule
I highly recommend doing exactly what I have been doing. Use ModularGrid to test-build your layout. It is an operational necessity.
ModularGrid calculates the total power draw (in milliamps, or mA) of every module in your virtual rack. It tells you exactly how much juice you are demanding from the +12V, -12V, and +5V rails.
You noted that your planned build is within the limits of the power supply you are starting with. That is good, but you need to understand the concept of Inrush Current.
The Magic Smoke
In electrical engineering, there is an old running joke about “magic smoke.” The theory is that all electronic components function because they have magic smoke sealed inside them at the factory. If you plug a ribbon cable in backwards or overload a circuit, the seal breaks, the magic smoke escapes, and the component stops working forever. It is a humorous way to deal with the sickening realisation that you just destroyed a $400 oscillator with a simple routing error.
When you first flick the power switch on your case, every single capacitor in every single module tries to charge up at the exact same millisecond. This creates a massive, instantaneous spike in power demand. If your modules draw a combined 950 mA on the +12V rail and your power supply is rated for exactly 1000 mA, that startup spike will overwhelm the power supply. The system will either fail to boot or rapidly cycle on and off, potentially damaging the digital modules.
Treat your power supply like studio headroom. Apply the 80% rule. You never want to run a power supply at maximum capacity. If your system draws 800 mA, you want a power supply rated for at least 1000 mA. Leaving a 20% to 30% buffer ensures your system boots cleanly, runs cool, and delivers clean, noise-free power to your audio path.
Moving into physical hardware is incredibly rewarding, but you have to respect the electricity. Plan the rack, check the math, leave plenty of headroom, and always check the red stripe twice before you flip the switch.